Breaking News
I’m currently developing a web-based tool to make this happen for free and in seconds.
Want to take it for a spin, click the link!
Have you wondered how people do those amazing grid photos?
Today I’m gonna show you how!
Instagram Photo sizes
First, we have to learn a tiny bit about image resolutions and rations, don’t worry I will do it quickly! 😁
Here are the best images resolutions to use if you want to be sure your images look the best:
- Instagram Post: 1080x1080px (1:1 ratio)
- Best size for those perfect square photos.
- Instagram Portrait: 1080x1350px (4:5 ratio)
- Tallest image allowed, ensure your picture really stands out when scrolling
- Instagram Story & Instagram Reel: 1080x1920px (9:16 ratio)
- Best size stories and reels take up the entire screen.


Grid Style Templates
You have probably seen all those cool photo grids on Instagram, right?
Now let’s get down to business on how to do it yourself!
First, you have to decide how wide and tall you want your grid.
Do you want it to take up 3 x 3, so it could fit an album cover maybe?
Or should it be a 3 x 1, so it’s an ultra-wide image?
A image grid consists of perfect square images 1080x1080px.
I’ll quickly teach you how to calculate total image resolution:
3×3 grid – perfect for an album cover
Total width: 1080 x 3 = 3240px
Total height: 1080 x 3 = 3240px
3×1 grid – perfect for ultra-wide images
Total width: 1080 x 3 = 3240px
Total height: 1080 x 1 = 1080px
I think you got the point now, you simply just do 1080 x (grid size) to get the height and width of your image.
Adobe Photoshop
First, you have to decide on which grid size you want to make.
I’m gonna show you how to make the 3×3 as it, shows how to do them both.
How to make a 3×3 grid in Adobe Photoshop
- Open Photoshop
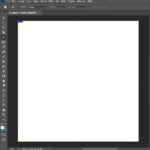
- Create a new Document
- 3240 x 3240 px
- Select the Slice Tool
- Hotkey: c (on windows)
- Drag over the entire image, so you end up with 1 slice.
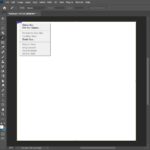
- Now right-click the little blue button in the top left of the image and select Divide Slice
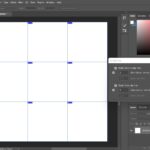
- Check Divide Horizontally Into
- Write 3 in slices down, evenly spaced
- Check Divide Vertically Into
- Write 3 in slices across, evenly spaced
- Click OK
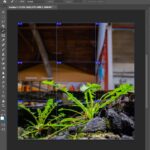
- Drag in the image you want to use for the grid, and place it as you want.
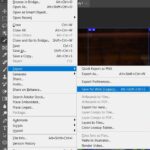
- Go to File -> Export -> Save for Web (Legacy)
- Hotkey: Alt + Shift + Ctrl + S (on windows)
- Hotkey: Alt + Shift + Ctrl + S (on windows)
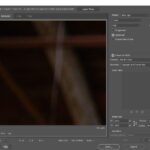
- Select the preset JPEG HIGH and hit Save
- That’s it! You just created your first images ready for a grid!
- All you have to do now is to upload them in correct order, start with the highest number.
If you want a 3×1 ultra-wide image, you can follow the guide using 3240x1080px.
Remember to just leave the Horizontally Divider unchecked


